Repair of AEG washing machines (AEG) is extremely rare due to the high quality of the German assembly.
However, no one canceled the external factors: power surges, problems with the water supply, hard water, etc. Therefore, such good washing machines as AEG can break.

Causes and signs of major breakdowns of the AEG brand SM
- Improper operation;
- Manufacturing defects;
- Force Majeure.
All these factors can cause a breakdown, as a result of which the heater or the control module may burn out.
The most common failures of SM AEG are:
- Water is in the drum, the washing machine does not wash.
- Water does not warm up to the required temperatures. The laundry is not washed due to cold water, or the washing does not start at all.
- Rotating the drum off the SM, you hear a rattle or knock.
- No water enters the drum.
- During operation, extra sounds are heard.
- Knocks out an automatic machine, RCD, traffic jams.
- Water constantly enters the drum.
Many of these failures are triggered by the following malfunctions:
- The heater failed.
- The temperature sensor has burned out.
- Broken electronic control module (controller).
- The drain pump has deteriorated.
Self-diagnosis of AEG breakdowns
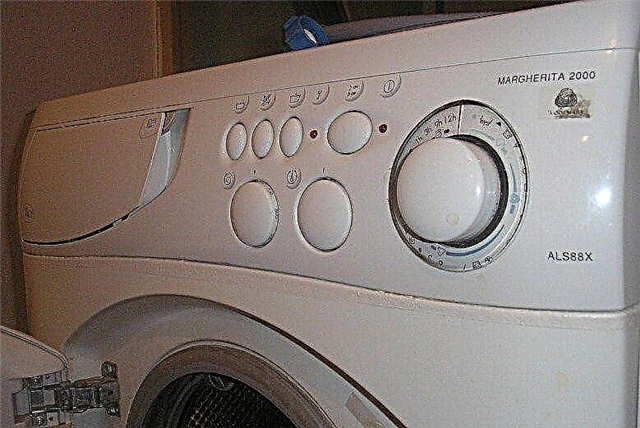
If the machine began to work abnormally, then you can try to find out on your own what is the matter. If your model has an electronic display, then an error code should appear on it: E11 (C1), E21 (C3, C4), E61 (C7), E71 (C8), E74, EC1, CF (T90).
What do these alphanumeric combinations mean, consider below.
| Error code | Reason for occurrence |
| E11 (C1) | No water enters the tank, which may be caused by a breakdown in the filler valve. |
| E21 (as well as C3 or C4 for some models) | Waste water is retained in the tank for a long time. This can be caused by a broken pump or, more rarely, a malfunction of the electronic module. |
| E61 (on some models - C7) | Water does not warm up to the indicated t. For example, you set the wash to 50 degrees, but the water remains cold. Often means a failure of the heater. |
| E71 (C8) | Incorrect resistance values of the temperature sensor. The problem can be both in the temperature sensor and in the heating element (but this is less common). |
| E74 | The temperature sensor is displaced, the wiring has departed. |
| EC1 | Locked inlet valve. There are two options: either the problem is in the valve itself, or the control module is out of order. |
| CF (T90) | Always indicates a failure of the electronic controller (module, board). |
Important! Error E61 (C7) can be seen only by turning on the self-test mode!
There are a lot of models of AEG washing machines, so the list of errors can be huge. We suggest considering the most frequent ones.
How to conduct a self-test machine AEG
Due to the fact that some codes appear only in the diagnostic mode, we will explain how to conduct it:
- Turn the program selector to the “OFF” (AUS) position, this will cancel the previously launched wash program. Unplug the machine.
- Press and hold two buttons at once: “Start / Start” (Pause) and “Exit”.
- Turn on the SM and rotate the programmer wheel 1 compartment to the right.
- Press the buttons from 2 points together again and hold until you see that an error code has appeared on the display.
Leaving the test mode is simple: turn on, turn off and turn on the machine.
Do-it-yourself AEG repair: repairing major breakdowns
Having determined what the trouble codes mean, you can start the repair yourself or call the wizard. If you are a brave master with experience, feel free to proceed with repair work: they will not cause you any special difficulties. Well, if you do not have time to understand the intricacies of repair, it is better to invite a specialist.
The heater in the AEG car is out of order: what to do?
This is relevant when detecting errors E61 (C7), E71 (C8)
Follow such an action plan to remove the old heater from the machine and replace it with a new one:
- Order / buy / find the original heater.

- Carefully inspect the back cover of the washer housing. Look for a modest sized sunroof for technological purposes. If it is there, you can be sure that the heating element is in front. If the hatch is not detected, then the developers placed the heater in the back. If in doubt, disassemble the back of the case first (it is easier to do there).

- Having found access to the heater, armed with a multimeter (tester), check it. If the node is working, the indicators should be 30 ohms.

- If you find a malfunction, get rid of the useless part. To do this, finding the large bolt in the center, remove it. Then release the heating element from the contacts and sensors.


Carefully! When pulling out the temperature sensor, do not pull it sharply towards you. At the top there is a tab that needs to be pressed in order to quickly remove the sensor from the hole.
- Shaky TEN either left or right, gently pull it towards you and remove it from the holder.

- Take a new heater, insert in place of the old, tighten the bolt. Replace all pins and sensors in reverse order.


DIY replacement of the temperature sensor

Actual for errors E71 (C8) and E74
In modern washers, a thermistor mounted on a heating element is used as a temperature sensor. Therefore, checking the heater with the tester, at the same time take the time for the thermistor. To replace it, it will also not take much effort and time - as described above, holding the tab of the sensor, carefully remove it and replace it with a new one.

Repairing the breakdown of the AEG drain pump
If an error E21 (C3, C4) occurs, indicating a breakdown of the pump (drain pump), you can remove it and replace it with a new one without the help of a wizard, having done everything yourself. Getting to the pump is a bit more complicated than getting to the heating element, so you should stock up on tools and patience.
To get to the location of the drain pump, you need to remove the front wall of the CM. Follow these instructions:
- Disconnect the top cover from the housing.

- Next, remove the front panel, behind which the manufacturer has located the drain filter (just lower the remaining waste water) and unscrew the bolts holding the pump (pump).

- Having taken out the powder container and rinse aid, unscrew the bolts on which the control panel is mounted.
- Carefully lift the panel, being careful not to touch the wiring.

- Remove the clamp from the cuff of the drum - you also need to get rid of it.

- Remove the bolts holding the housing cover in front, removing it so far.

- Rid the pump of the wiring and loosen the clamps.

- After taking out the pump, remove the snail and inspect the impeller - it may contain breakages or debris. Along with this, taking the tester, you can check the motor winding.

- After verifying that the pump is malfunctioning, install a new part that matches your AEG model. Connect the sensors and wires, reassemble the AGR in the reverse order.


Repair of AEG control board
Repair or replacement will be necessary in case of errors CF (T90), EC1 or E21 (C3, C4).
Often a breakdown of the electronic module is accompanied by breakdowns of other systems and components, therefore the first difficulty that can be encountered during repair is the breakdown diagnosis.
The second problem is that it is not always clear whether it is worth changing the control module, or you can fix it.

That is why, if firmware or replacement of the board is required, it is better not to save money and contact the master, who will check the board with special equipment and issue its verdict - repair or change.
Optional: what to do if the AEG machine is flowing
Another common problem faced by owners of AEG brand SMs is that their washing machine leaks. Water and electricity are not best friends, so the problem is acute and dangerous, it must be quickly resolved.
The culprits in this situation are the manhole cuff or the inlet hose. The pipes going to the drain pump could also fail, or the stuffing box has served its age. You can replace damaged parts with your own hands - in AEG machines, the replacement of these elements is the same as in other brands.
Difficult, but possible: repair of old AEG washing machines
In conclusion, we say that the repair of breakdowns on different brands of AEG washing machines (AEG 60060 SL, AEG 60060 TL, AEG OKO Lavamat 1270, etc.) is almost the same, or rather, it is necessary to repair it using the same algorithms.
If bearing replacement is required on an AEG washing machine that has been operating for more than a decade, this indicates wear on parts, and other parts may need to be replaced. That is why it is not always possible to independently deal with the problem: in some cases, it is still worth entrusting your equipment to a professional.
This video clearly shows what we did not describe in detail - replacing bearings in washing machines, including AEG models. Better to see once to understand the algorithm.